Showing posts with label sculpture. Show all posts

Tuesday, October 27, 2015

Flag idea


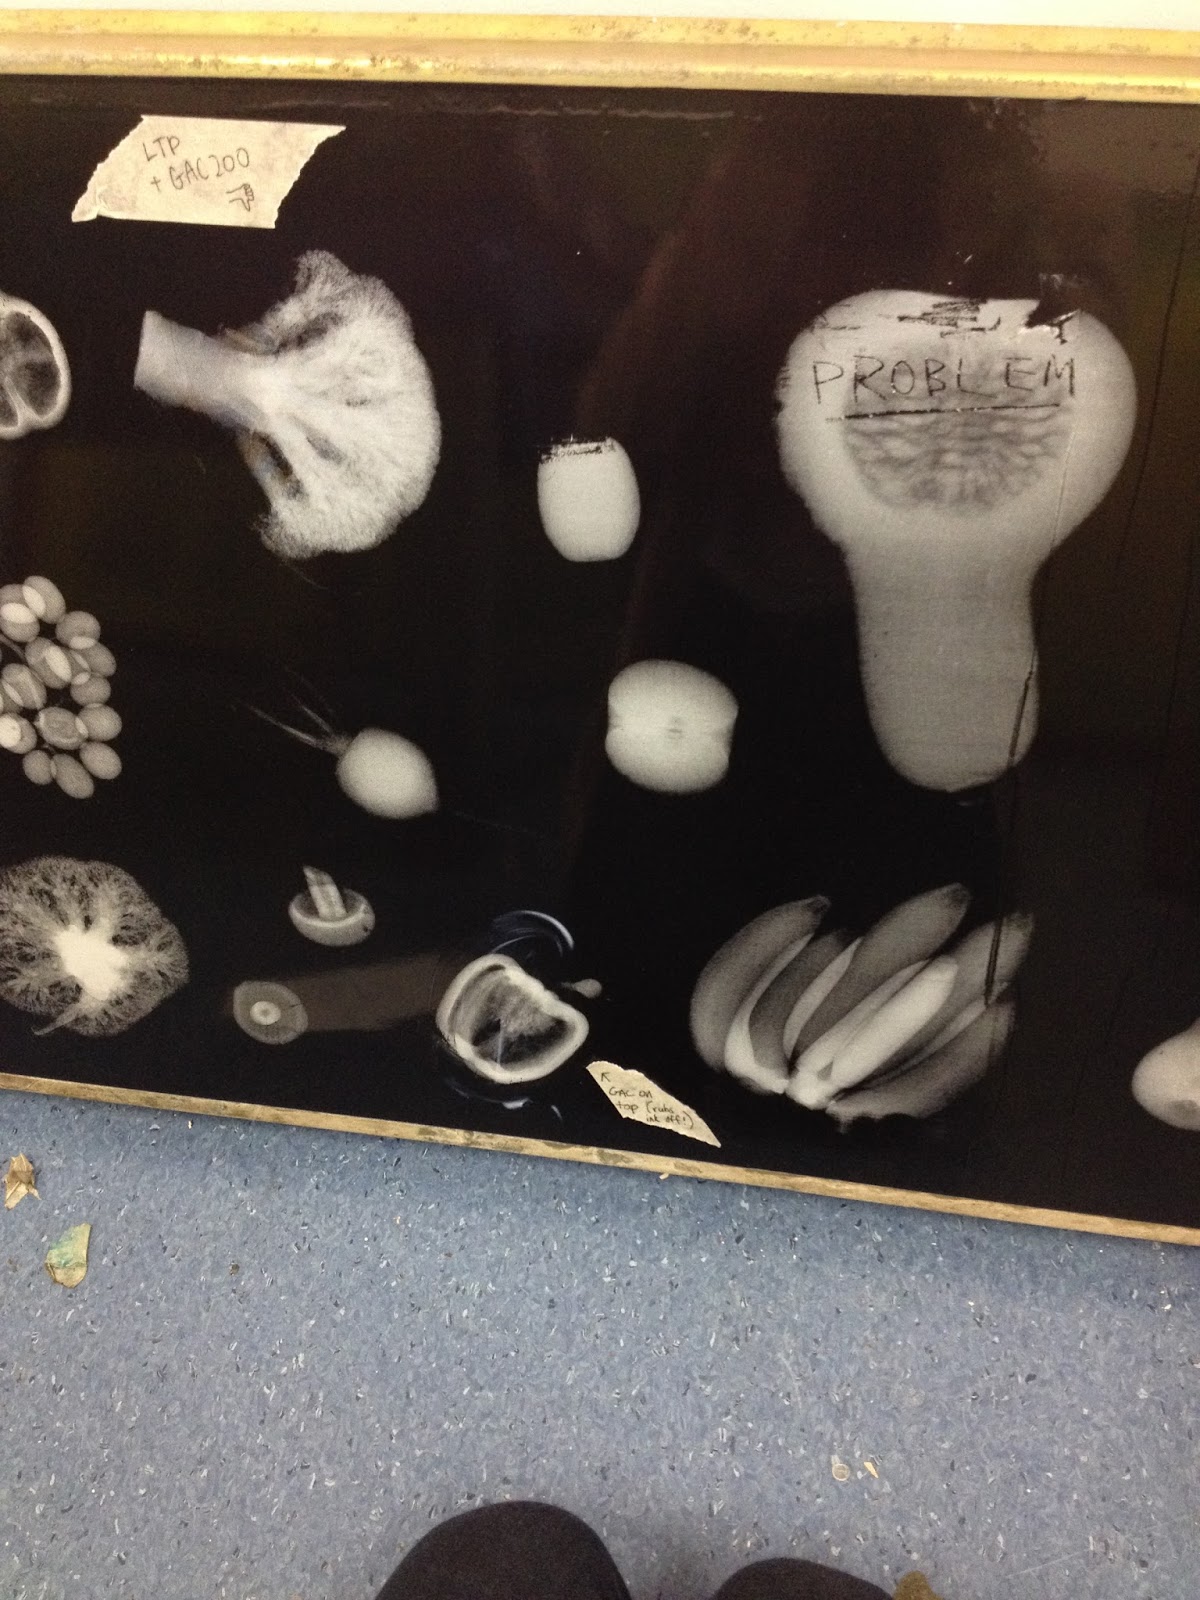
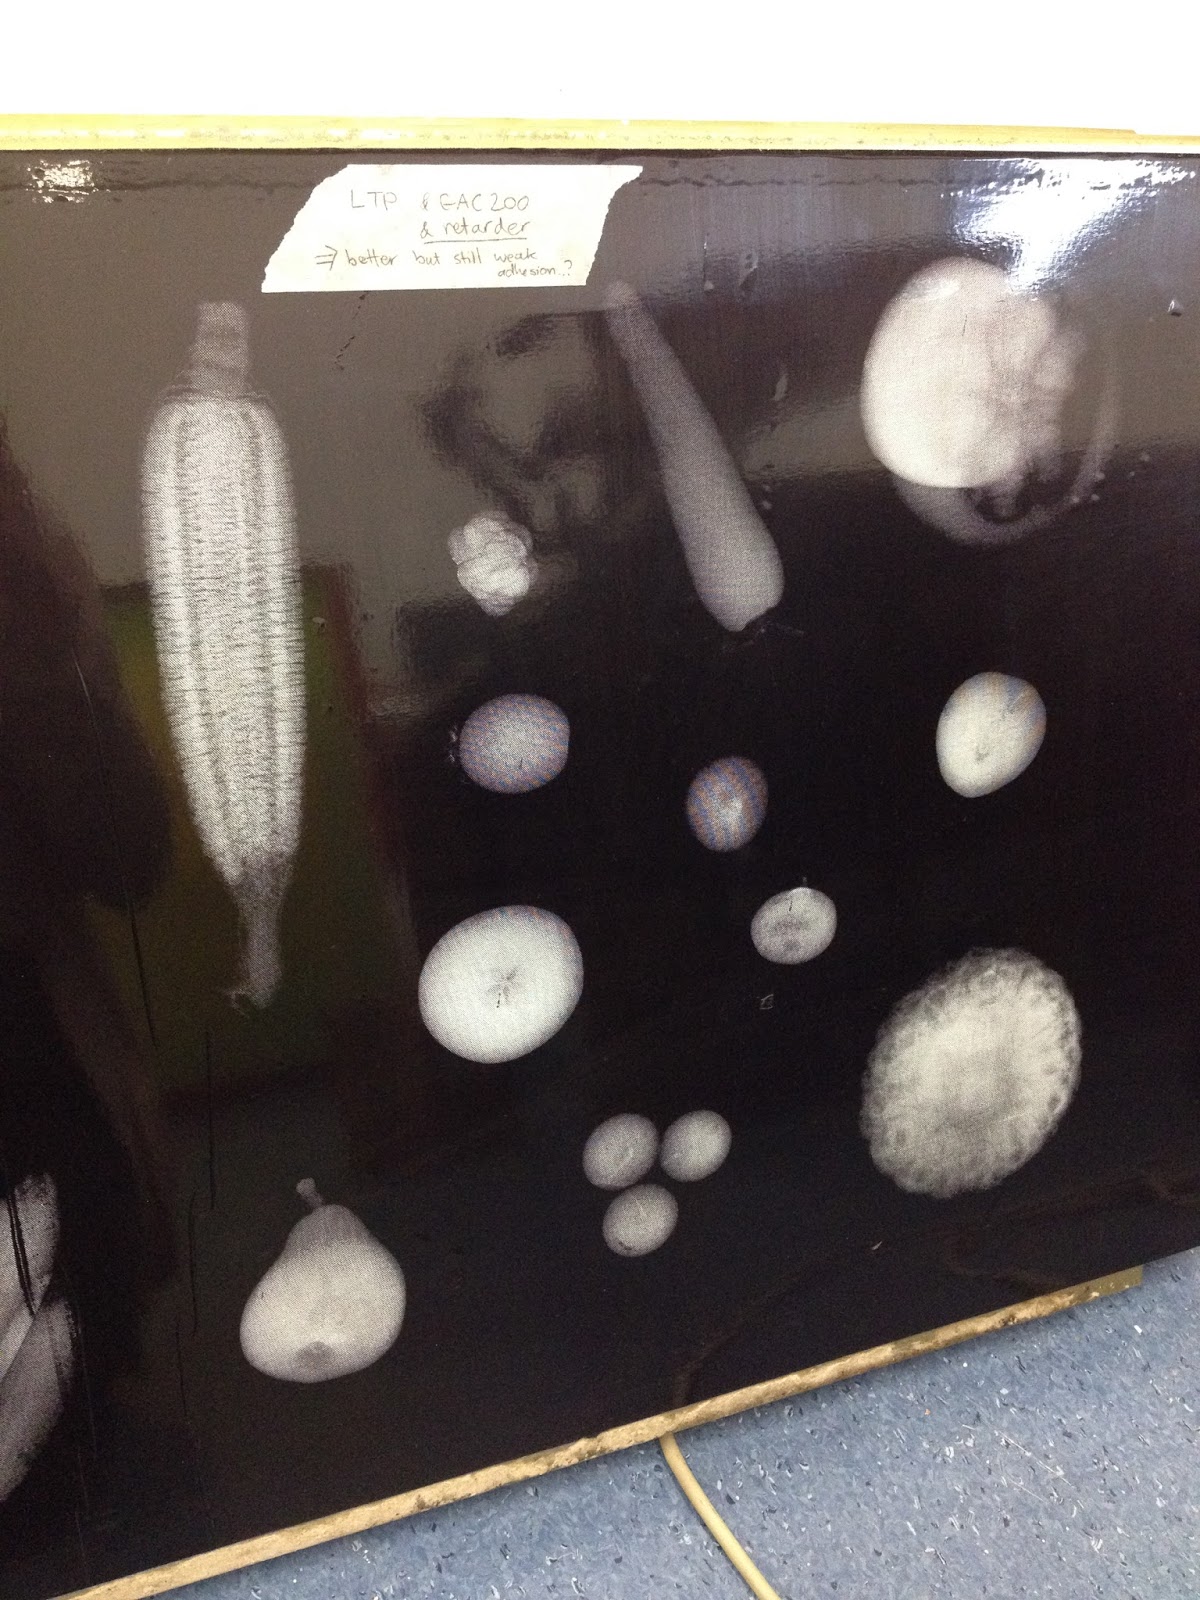
I recently printed one of my fruit box images onto fabric, thinking of doing a series of flags. In my final crit, my classmates discouraged this idea, and after some reflection I understand why. Bringing in the 'flag' idea, which I thought might help with my reference to globalisation/borders, is too topical-bandwagon and detracts from the real focus of my project.

Thursday, October 22, 2015

Simon Ingram

Simon Ingram's practice really fascinates me. I remember his show at Gow Langsford earlier in the year, Paintings of the Sun. My project has changed so much since then - it has taken a step in a similar direction to his, I think - and so on reflection I have a lot more appreciation for the work than I did at the time.

Elements of interest:
-Incorporating machinery and mechanical equipment;
-live, autonomous movement as part of installation;
-Drawing from scientific data/imagery
-Using coding systems to determine aesthetic choices and translation
-Overlap between different media (installation / painting)


“By deferring to the machinic, by tuning his antennae towards the ether, by translating sound waves into computer code, Ingram allows that he (and we) are enmeshed within a much larger system. His works demonstrate, in both their mode of making and as finished products, the subtle, irrevocable connections between organic and manmade, technological and human, abstract and animate, visible and invisible, coded and real. He lets things show us something about themselves and reminds us that our minds and bodies are closer to nature and to machines than we might like to imagine.” 

Christina Barton, Painting Machines, Bielefeld: Kerber Verlag 2014, p.6. 


His works talk about art itself, and processes of making, from a sort of analytical, logical, scientific/engineering angle. To make a machine that paints - isn't this essentially replacing the artist with a robot? Simultaneously, the works seem to talk about scientific processes and technologies from very much an art-world, 'outside-the-box' angle. To be a painter, and to use scientific data to determine decisions and aesthetics via a 'coding' system, and mechanical equipment to execute it. These are two opposing worlds, each addressing one another and working in surprising compatible way.

Tuesday, October 20, 2015

Aparna Rao

Since my planned moving installation is activated by the viewer walking past, I enjoyed this TED talk - artist Aparna Rao also makes viewer interaction part of her artwork.


Friday, October 16, 2015

Installation for final crit


A video of the conveyor in motion:


Thursday, October 8, 2015

White conveyor belt - options

A few different test layouts using the vinyl stickers I printed my box images onto:

1: separated
Here you can also see the new legs I made for the conveyor belt! The other ones were different heights so the surface was on an angle.


2: overlapping
Because the stickers are transparent, and I have more than enough to cover the full surface, there is also the option of having them overlap slightly...


or arranged with slight tilts:


Wednesday, October 7, 2015

Documentation: A catch up post / series of unfortunate events (October)

It's been a while since I posted any documentation. This is not because I haven't been doing work - quite the opposite. I've been working so much I haven't had time to document anything properly.
It has been an absolute nightmare few weeks. Bear with me here. There is a happy ending, I promise.
However, the number of times I have gone home in tears is actually embarrassing. So is the number of days when I spent more than 12 hours working solidly at elam.
Now that all the stress is behind me, though, I think it was worth it...

As mentioned in my last post (which seems nightmarish enough, but it just gets worse from there, so much worse…) when I removed the roller bar, the rubber belt got slack and rubbed against the bolts at the back.

The back of the conveyor, roller bar visible
I figured I'd just sort this issue out later, and just get started straightaway, as I anticipated it was going to take ages so I was in a hurry to get printing. And then, when I took off the vinyl test layer, to my horror, it left residue all over the rubber, and I spent a full day scrubbing it off.

Then I began printing directly onto the rubber itself. It worked okay, would still scratch off when rubbed with a fingernail, so I did a few test patches with different gac / gel mediums mixed with the ink to improve adhesion. It seemed to work better with just the ink, and no additives.
To protect the prints from getting damaged during transit / handling / operation, I wanted to glaze them with some sort of clear plastic coat. I did a few test patches on the blank rubber and the one that worked best was a mixture of Gac 200 and some self levelling clear gel.
However, when I painted this over the prints, they dissolved. I had to scrub off the prints on the first conveyor belt and start over. Again.
So very depressing.

The next week, Ellen and I sussed out a way to seal the prints without this disintegration happening: using spray varnish and waiting for it to dry before applying the medium mixture. This became a very time consuming process as the varnish needed 24 hours to dry, and I could print the conveyors only 1/3rd at a time, with prepping and printing the screens took at least a day, plus drying time of the prints and the medium, so it took over a week to do the first two… It felt worth it, as I was so happy with the depth created by the wonderful sturdy layer of plastic-y varnish.

(The bits of masking tape at the bottom are markers)


Until it leaned against a chair leg overnight and stuck, ripping up a chunk of the medium as well as the print underneath. And then, horror of horrors, the same thing happened with some glad wrap that had been on the ground and got stuck to it, ripping off a whole section of the glaze/print as I carefully peeled it off. And then, once a finished/glazed conveyor had had a full week to dry, I put the roller bar back in, left it overnight, and realised that this was never going to work.
How silly to think I could apply a layer that was both a) adhesive enough to stick to the rubber, and b) not adhesive enough to stick to anything else. Um. Can't really have both.

a distinct indented line was left wherever the roller stopped...


Even without the roller, the belt would make contact with the bolts on the other side, which would cause same problem elsewhere.

Basically, I was not even back to square one, I was ten steps behind where I started.
Getting the varnish off all the prints so far took many days of hard labour, several metres of brillo pads, some paint stripper and a bottle of turps. Nothing could be more demoralising than having to put in this much effort to scrub off your art just to start over again. My blood, sweat and tears went into this artwork. Literally.

removal in progress - bottom left corner.

So, two weeks of intensely hard work wasted; physically and emotionally exhausted; and after having massacred my brain cells from the fumes (I wore a proper respirator mask while using paint stripper, but I'm still paranoid about those toxic fumes) - I started again.
Pete, the metal workshop technician, said I should cover up the roller with soft tape, but I decided to remove the roller altogether, and print onto the rubber using no other media. This was a reluctant defeat. I'd liked the conceptual connections, with the spray varnish linking to the 'dip spray' treatment of imported produce, the gel coat relating to petroleum based wax some fruits are coated with in order to 'maintain freshness' etc. Instead, the list of materials would now read, simply, 'ink on conveyor.''
This way doesn't have quite the same depth but is much more simple, and means it will be easy to re-do any prints should they get damaged in transit from one building to another, etc - rather than having to strip the glaze off and patch it up again, which I’d realised would never work. Sure, without the roller the edges will rub against the bolts at the back, but without the glaze, this damage won’t be evident, as long as the prints themselves are well clear of the edges.

So I got printing... Again.

more masking tape markers
And third time's the charm.


Each conveyor contains about 13 prints, over around 7 screens. Many of the prints needed to be cleaned off straightaway and done two or three times because of blemishes or streaks.
Each screen takes at least a couple of hours prep time - and things occasionally go wrong while water blasting, right at the end, and the process needs to start over.
Considering these hours that went into prepping the screens, it felt like a waste to clean them off again straight away. So I tripled my workload by doing some prints on paper  - white on black, and coloured on white - before cleaning the screens for the next rotation of prints.


Prints on paper
All up it was an extraordinarily long process, but it became enjoyable when it was working (finally!) and I was in the swing of it. I finally finished last Friday and didn't know what to do with myself!!! Full images of the paper prints (above) are to come. I'm still keen to do some different colour combinations, although this would require re-doing the screens all over again.

Of course, with our essay drafts due a while ago, I've been working on my essay at the same time as all of the above. The silver lining of the whole horrendous process I've just described is that it inspired me to come up with the analogy between screen printing and agriculture. Now I know full well how a farmer would feel over a failed crop, and why they would turn to resorts like pesticides, chemical fertilisers etc. if the situation called for it. I would usually never use toxic chemicals like turps and paint stripper, but desperate times do indeed call for desperate measures!

And I have also been busy in the metal workshop, making...
-legs for the white conveyor belt;
-new brackets for the black ones, which I redesigned after my visiting artist crit because I thought other method was kind of clunky (and, to continue my streak of bad luck, I had to go back to the steel shop because someone stole the metal i’d bought a few weeks earlier!!)
-brackets for the sensors

hard at work
And now that the black ones are done, I've been thinking hard about what to print on the white conveyor belt. Screen printing won't be possible on these due to the textured surface and the roller bars underneath which are not removable, but the vinyl stickers I have printed seem to work fine. But do I really want to print more fruit, or found fruit/veg boxes, onto this? I've got a few other ideas... the only issue now is TIME. And not enough of it. One month to go!!

Monday, September 7, 2015

Printmaking nightmares

Following on from my troubleshooting with printing on adhesive surfaces...

I had a bright idea for printing on the conveyor belts. I got some black vinyl to cover them up with. That way, I could print my images on the vinyl, and if anything went wrong (as things often do with screen printing) I could easily peel off the vinyl and do it again.

Sounds easy.

It wasn't.

Two nightmarish weeks of experimentation ensued, and they were definitely not worth the trouble.

Nope, nope, and nope.

Above: CCG inks and Gac 200. This worked OK, it still rubbed off when scratched with enough pressure.

Using Live to Print plant based inks and Gac 200 in an attempt to make them more adhesive to the shiny surface... No such luck. Even when fully dry it did not stick to the surface at all and flaked off with the lightest touch.

50/50 gac to ink ratio, and still it rubbed off with the brush of a finger.

I had the best of intentions to use Live to Print inks, because they are so nice and matte in contrast with the shiny vinyl surface. I even emailed Matthew Lewis, the maker and supplier of these eco-friendly inks, to ask if he had any ideas for how I could make this work. Basically, his reply was that it's never going to work. The Live to Print inks are made for paper. For printing on plastic, you need another type of ink entirely, and no matter how much medium you add plant-based inks won't ever cut the mustard. In the meantime I'd been busily googling solutions, and this website reconfirmed that it was just never going to happen.

Then, deciding that the 'temporary' plastic surface wasn't worth the trouble, I removed the vinyl. Or, I tried to. It resisted coming off, and when it did, it came off in small strips and left a film of extraordinary sticky adhesive. It took six hours of peeling, scrubbing and half a bottle of rubbing alcohol before the surface was back to its original state.

I'm just so glad I used this as an experiment and didn't have to go through the same process with the other four belts, too.

Anyway, now I'm trying to work out a way of removing the roller from the back of the conveyor, because without that bar of steel pressing against the print surface, I won't need to worry quite so much about the durability of the ink. It's just a matter of whether it will still rotate without this tightness. The question then is what can be done about the metal brackets I've made to prop out the base from the wall - without the roller bar, the belt is slack, and rubs against these.

The adventure continues.

Visiting crit - installation

For my crit with visiting artist Lisa Reihana, I did a test installation in the BFA Hons presentation space on the 3rd floor.


A video to show the conveyor belt moving:


Saturday, September 5, 2015

Documentation: in preparation for visiting artist crit

Judy suggested in the middle of the year that I try printing on other surfaces, and that I try to incorporate movement. The idea of a conveyor belt came up in that discussion.

How cool that would be - to print onto a conveyor belt. So I had this grandoise idea, but no idea if, or how, it would ever come to fruition...
Then, the stars aligned. Someone just happened to be selling a supermarket conveyor belt on Trademe. It was cheaper than the other ones listed, some of which were industrial, thousands of dollars, but this one was still quite an investment. I went for it. And I feel really excited about the installation I have in mind for it.

As a test for the visiting crit, I wanted to hang it on the wall, but this poses some problems as it's 50kgs. Hanging it sideways - horizontal - was the original plan. When I emailed the manufacturers (all conveyor belts in NZ are custom made, and the ones I bought have handy ID numbers and it turns out they are still under warranty - awesome) they pointed out that, thanks to the inconvenient force of gravity, if hung sideways the rubber belt would slip down and possibly get damaged. So, vertical it was.
After a lot of discussion with Pete about how the wall mount could be achieved, I set to work. I measured it all up; went to the north shore to buy some steel; learned to cut, drill, bend and weld; and with these newly acquired skills, made a bracket to connect to the back of the conveyor belt and hook over the top of the wall...

Bend it like Beckham

I also had to find a reflector that would work with the sensors that attach to the motor. The manufacturers told me to buy a certain kind, because the maximum range of the sensors depends on which kind of reflector you use. I emailed a few electronic shops and, after receiving a few curt 'no's, finally managed to track one place that had the right kind.

This can be 3 metres max away from the sensor

And the other advice in their email was super exciting. I'd asked whether the electric circuit could be customised so that when switched on the conveyors could be displayed rolling continuously, and whether the speed could be adjusted. They informed me that this would be a terrible idea because the motor would overheat. The way the sensor works, though, is that it only triggers the rotating motion when the reflection is disrupted. Then, it will rotate for about 10 seconds, or until it is disrupted again.
This is because in a supermarket, or other shop, you want the movement of the conveyor to stop as soon as the customer's goods reach the edge by the cashier. So that's where the sensor is placed. When something reaches that point, the movement is halted. When that object is removed, the conveyor moves again... and the next item comes along, breaking the signal, pausing the movement again.

Meaning that the conveyors will be stationary until someone comes close enough, breaking the signal. Just walking past the work will set off the rotating motion. And it will stop moving if you stop and stand in front of it.
A work that is activated by the viewer!! I'm so excited about this.

Wednesday, August 26, 2015

Documentation: petri dish arrangements

Some more compositions…

Banana, separated and stacked alternately, faced in opposing directions so two forms overlap in 3d space:


Just one form on the OHP:


With the projector lens attached…


A few plates on the lightbox


Projected


Each item at full size:


The whole banana divided by 2


Spare petri dishes to make the height even and the smaller forms ‘hover’


All of them stacked together - extremely fragile!! (Would need a way to connect them with glue or a sort of frame…)


Below: each piece divided into 3. This works out perfectly to scale, as the original cross-sections were 5mm thick and the petri dishes are 15mm high. The resulting ‘stretched’ sculpture was 3 times longer than the original piece of fruit, so dividing this into 3 returns them to their original size.
I like the conceptual implications of this process. The process and ethics of CLONING is a topic I’m really fascinated by. (Bananas are all genetically identical.) For me it speaks to the idea of genetic modification to produce higher yields, leading to a product which might be more resistant or bountiful but which perhaps becomes ‘less’ in other ways, perhaps less tasty or nutritious or healthy… There is no winning argument here and no magic solution, it’s always a compromise.